There are about a gazillion posts out there on the interwebz about how to make homemade yogurt. This is one of them.

I consulted various websites, blogs, and friends before attempting my yogurt batch. They all said the same thing: “making yogurt at home is easy!” Score. That sounds right up my alley.
So, I bought some yogurt cultures from an online retailer. The cultures were to be mixed with a cup of milk and left on the counter for 16-48 (48?!) hours to create the starter. After 22 hours, I was tired of waiting, my milk was just curdled (not solid, like yogurt) and I decided that was a bust. So much for easy, no-machine-required yogurt making. “Maybe you’re just not cut out to make yogurt,” said Hubs.
Challenge Accepted.
I moved on to “the crock pot method,” determined to make some mother-effing yogurt. This method seems to be the most popular among People Who Blog About Yogurt. I followed the blog post exactly:

After mixing your starter back into the pot of warmed milk,

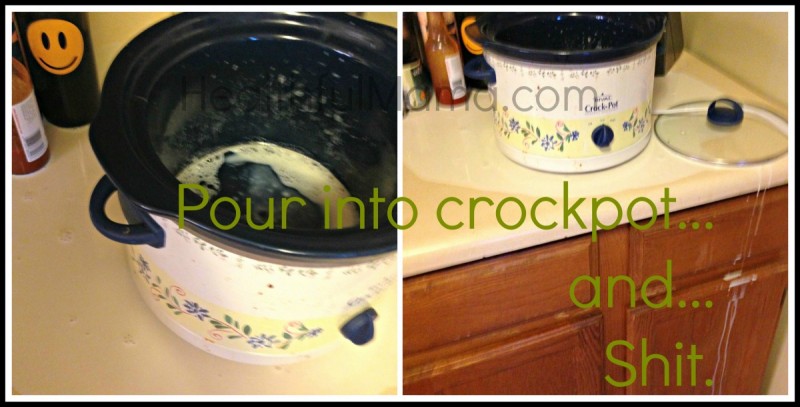
Yes, people, that’s correct. The bottom of my Crock Pot(TM) cracked at the edge and milk was pouring across the counter and down the cabinets. And here’s why you shouldn’t always trust bloggers: (Wait. I’m a blogger. Trust me! You can trust me! Really, you can trust me. You can trust me? You trust me? Really?) Anyway, bloggers don’t always get recipes right. In fact, I will tell you straight-up that you should proceed with caution if you’re not much of a cook when following a recipe found on a blog. And, apparently, I’m not much of a cook.
The recipe I followed instructed to turn on your Crock Pot(TM) BEFORE heating the milk, to get it warmed up. Now, the First Rule of Crockpot Club is Don’t Turn on The Crock with Nothing In It. I should have heeded my own knowledge and realized that the temperature change when the heated crock got splashed with slightly-cooler milk would create a problem.
But all was not lost!
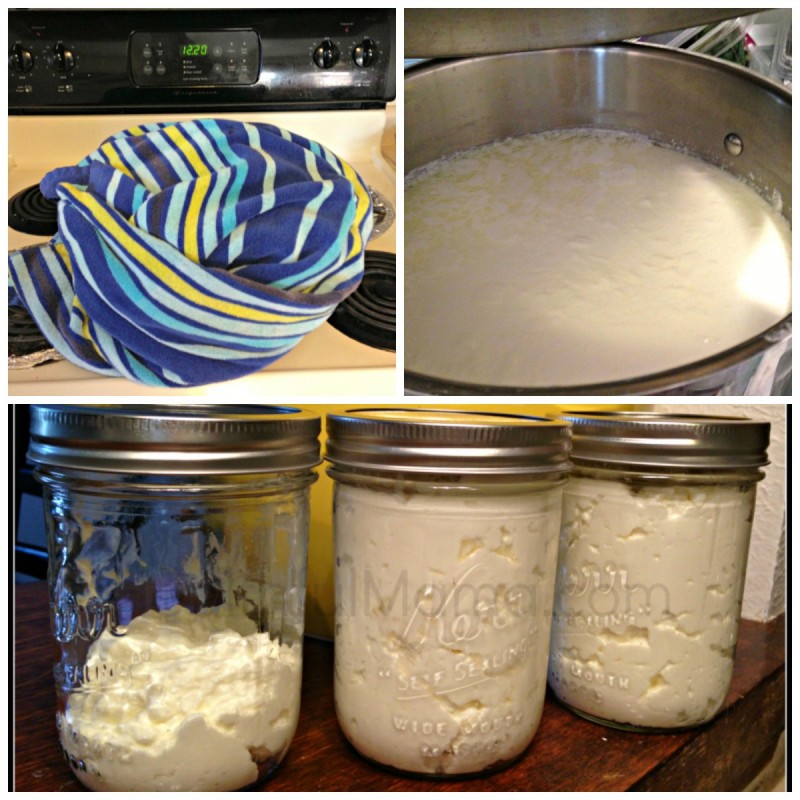
Thankfully, stovetop yogurt (not this bastardized form of stovetop/crockpot ridiculousness I was following) is really simple. I had not poured all of my milk into the crockpot, so I covered the warmed milk again, wrapped the pot in a towel, and put it in my oven with the light on. After 16 hours, my yogurt was miraculously firm and adequately yogurt-y.

After losing some milk to my first failed attempt, and losing some milk in The CrockPot Incident, I had a little less than a gallon with which to work. I strained the yogurt through cheesecloth (probably not necessary, but I wanted it THICK), and it yielded about 40 ounces of Greek yogurt.
The yogurt tastes delicious and it’s super-thick & creamy.

Overall, I’m really pleased with the results and will be making this again, sans CrockPot. RIP, my friend.
And make sure to save that whey! You can bake with it, ferment with it, or make a tasty drink.

Homemade Greek Yogurt
Ingredients
Method
- In a large pot, slowly heat milk over med heat to 185 degrees, stirring occasionally. Milk will appear frothy. Do not overheat. You can use a candy thermometer to monitor temperature.
- While milk is warming, fill a sink with cold water.
- When milk has reached 185, remove from heat, cover with a lid, leaving lid cracked for steam to escape, and place pot into the water bath. Be careful not to get water into the pot.
- When milk has cooled to about 100 degrees, remove a cup of the warmed milk and mix it a bowl with the greek yogurt.
- Pour milk/yogurt mixture into the pot with warmed milk and stir thoroughly.
- Cover the pot, wrap in a heavy towel, and place in the oven. The oven should not be hot nor turned on. Turn on the oven light and allow the milk to culture for 14-18 hours.
- Once yogurt has set, you can drain the yogurt through cheesecloth for an even thicker preparation or simply strain off whey (yellow liquid) and refrigerate immediately. Store yogurt in glass containers.
Have you ever made your own yogurt? What method did you use?


As a blogger who has blogged about making yogurt I understand your frustration. I skipped all the super DIY ways to make yogurt (in the oven, in a cooler…etc.) and got a yogurt maker. Since I am sending yogurt out in three lunches everyday, including my own, the individual glass containers that came with maker worked for me. What I am struggling with now is how to prefect the vanilla flavor we like… tried vanilla bean while heating the milk and vanilla extract during heating or cooling. Still have not gotten it perfect.
I considered a yogurt maker, too, if we liked how homemade yogurt turned out. Good to know that the individual jars are a lifesaver! How often are you making yogurt?
Sad! Although if it makes you feel better, I at least always had qualms about what was in the lining of crock pots. I have a yogurt maker (which also took some trial and error) but have friends who’ve had luck with the oven method.
I keep hearing about how people love their yogurt makers. I may have to do some research…
Looks like quite an ordeal! I make mine in the stove over night. Works out great every time. I found that the clue is to heat up the milk pretty fast but pay full attention. Because when I do it slow i always start multi tasking and then it gets to hot. I also like to strain mine. I use the whey for soups and bread baking!
Good tips, thanks!
Thanks for sharing your experience! Our family makes yogurt heating milk on the stove too, cooling a little, then adding natural yogurt (bought or from previous batch) and then letting it culture for few hours or overnight (depends on a batch every time) just on the table or if need faster in warm water bath. You can find it here: http://ongreencarpet.blogspot.com/2012/06/home-made-yogurt.html
However, I really want to try the Greek version you described, so I’m gonna experiment with the oven light procedure next time!
Thanks for sharing!
I just started making yogurt myself. I bought a yogurt starter from Culturesforhealth.com, I am using a round dehydrator that I converted into a yogurt maker. You can read about how I did that on my blog. 🙂 It’s been working out pretty good, except for when my 3 year old decided to turn the dehydrator up to 150° F on my last batch. I’m trying to make my next batch with that yogurt right now, crossing my fingers that she didn’t murder my culture.
I followed many recipes for yogurt until I got to yours. It’s the only one to work! The secret is having the light on a cold oven. Thank you so much for your insight!
So glad you’ve had success, Judy! I just made another batch a couple days ago after not making any for months. I forgot how easy it is!
I’m sorry, but you had me laughing. You sound like me when something doesn’t work out. I am looking forward to following your recipe. My goats will be giving birth soon, so I will have goat milk for making yogurt. I discovered you through pinterest. You got my attention on how “NOT” to make yogurt .Thank you for sharing.
Glad I could make ya smile, Vicki! Goats milk yogurt sounds delicious, especially made fresh! I appreciate your comments and for dropping by 🙂
Just wanted to say i love the realness of your blog, I personally have problems following directions, but so far all my fermenting projects have come out great, kombucha, water kefir, milk kefir, tomorrow I will attempt a kind of crock pot yogurt, with coconut milk, as i’ll be using oven later in the day, and also i got some mesophilic yogurt cultures that I’m going to try, with some regular milk and cream mix, as i’ve read that it may not be good to do coconut milk with them, after i’ve made a few batches and have some to experiment with I’ll try the coconut milk with them, but thanks for the laugh as well as the advice and recipes.
Oh and for anyone who is really interested in fermenting and cultured foods cultures for health is a great site. Also has anyone tried soaking grains, since i have lots of whey because I straining my stuff as I like a thicker end product, I’m thinking about trying it with quinoa, or steel oats any ideas?
I learned how to make yogurt from a friend who was born and raised in Iraq. The best thing I learned is that you do not have to buy yogurt cultures! You just take a few large dollops of yogurt (I use FAGE Greek Non-fat yogurt) and add it after the milk is ready.
I use a regular big pot with a gallon of 2% milk. After the heating of the milk and adding the FAGE Greek yogurt (mixing with some of the milk in a small container and adding it to the pot and stirring gently… I do the same as what is written here with straining it through paper towels. (I didn’t have any cheese cloth or coffee filters).
I then put it into a large bowl (I use a large stainless steel bowl with a snap on lid and cover the whole thing with a blanket. Towels do not seem to do well enough. The blanket keeps the temperature steady. I let it set overnight (about 14-20 hours).
I save a little of the finished product from each batch as the yogurt actually seems to get better and better each time.
I also think it tastes best plain the first day. After that I add frozen blueberries and a little Stevia sweetener or honey and half a crumbled walnut. Each batch lasts me about two weeks.
Thanks for sharing, Joseph!
I do the stovetop method, too, but I put the warm milk/ yogurt starter (yogurt saved from last batch) mix in individual glass containers (I like the weck jars, but little mason jelly jars work, too – as do some of my heavy duty juice cups from Ikea – score!) & culture them in the oven on a cookie tray with a towel over it.
Takes 6-7 hours & makes GREAT yogurt. I like doing it this way, because the kids can just grab a yogurt out of the fridge for breakfast & it’s just the right amount. Also, I use our life factory baby bottles (with lids, not nipples) to culture lunch box size yogurts. The kids love having yogurt in their lunches. Anyway, I do wish I had more of those 4 oz bottles!
So glad I read this first before doing the crockpot method! Trying this for the first time tonight! How long does this usually keep? There’s only 2 of us but we can go through it pretty fast!
Yogurt-making resources say up to two weeks, and I’ve found that to be true. I like to separate the large batch into smaller portions. I keep them in Mason jars, which makes it easier to use, and then you’re more likely to eat it all! 🙂
How frustrating! Like you I combed the web for a great yogurt making recipe and I found LOTS of folks saying LOTS of different things. I synthesized it all and came up with a fool proof method that I use to make all of the yogurt for my family. We eat a lot of yogurt and I use this recipe once a week, hopefully you can trust it! You can find it on my website http://www.thescratchartist.com
I hope it is helpful!
Hi there!
Thanks for posting this! I’m wondering if this will work with coconut milk instead of regular milk??
All I can say is wow! Bless your heart.
Dash! I use the Dash machine and it is perfect every time…..and I cant get my milk to 185F with out filling my double boiler 2 or 3 times. So we settled for 172F for 5 minites.
I am getting ready to try your method because I am being a but impatient but have successfully made crockpot yogurt for more than a year now. The recipe I was given was to put milk on crock pot warm for 3 hours cut off for 3 hours to cool down. Add your starter. Wrap crock pot (unplugged) in towels and let sit over night.
I use my ceramic slow-cooker insert and don’t use the metal heating container. I follow your recipe as far as heating the milk and then cool it to about 115 degrees. I use a heating pad on the lowest setting covered with a towel, place the mixture in the pot and cover with a towel to keep the heat constant. It usually sits for about 10-15 hours depending on the consistency I’m looking for. I then pour off some for smoothies and strain the rest for Greek yogurt. I did have to test the temp of my system to make sure that it was not too hot or cold. Works every time.
I see your final result… it does look tasty, and a bit grainy.
My secret? Whip it! Seriously, after you strain it throw it in the kitchenaid with the whip attachment. Turn it on about 4 or 6 (any higher and you’ll get specks of yogurt all over.)
It will be the smoothest, creamiest, way better than any store-bought so good I eat it like Lebneh with olive oil and salt kind of Greek yogurt!
i use raw milk, no heating necessary. Quart of milk with 3 scoops of yogurt with cultures. Mix, cover, put in oven 20 hours with the light on. Done. Yum.
Thanks for the Post!
I use almost your exact method… heat is up to 185 deg F then cool down in an ice bath. But instead of an oven, I cover with a towel and place it on a adjustable heat heating pad. I don’t like to have to strain very long so I use a Greek yogurt starter.
This is actually Bulgarian starter that’s popular to use for Greek yogurt. It produces fairly thick yogurt just by fermentation so less straining will be required.
Glad to hear I’m not the only one with failed yogurt attempts. I tried crockpot yogurt before, but it came out with a very mucus-y texture. We couldn’t even eat it!
Now, I use an oven method fairly similar to yours with consistently wonderful results! I only use ¼ cup of Greek yogurt (Oikos is my favourite) as the starter for 4L/1 gallon of milk. We prefer a shorter culture time 8-9 hours) because we don’t like it as so tangy. And I just pre-heat the oven to the lowest setting instead of using towels. Once drained, I whip it in my mixer to smooth it out.
We love using the whey in our pancakes. The effect is similar to buttermilk pancakes. Yum!
I recently had a half gallon of milk that was within a couple of days going bad. It was lactose free skim milk with less sugar. I figured I had nothing to lose so I would try making yogurt. After searching recipes I decided to heat the milk to 200 degrees in a glass bowl in the microwave. It probably took about 20-25 minutes and I stirred it every few minutes. It developed some strings so it probably needed to be stirred more often. Or maybe just strained. I let it cool to 110 degrees and then stirred in a half cup of nonfat Greek yogurt. I covered the bowl and wrapped it in a towel and put it into an insulated bag along with two covered mason jars of very hot water and just let it sit on the kitchen counter. After 11 hours I refrigerated it and the next morning I had great yogurt. I did strain it for a couple of hours using some cheesecloth to get it more like Greek yogurt. Can’t say I would do this all the time but it was a great way to not waste milk and tasted great.